Lightroom Export Settings
Sunday, May 01, 2022 | By: Natalia Robert
In the world of Lightroom, you don’t save photos - you export them. While Lightroom does being some basic exporting settings as default, you can customize the settings to your needs. Better yet, you can save your custom settings for future use! Let’s explore the world of export settings and presets.
What should your export settings be?
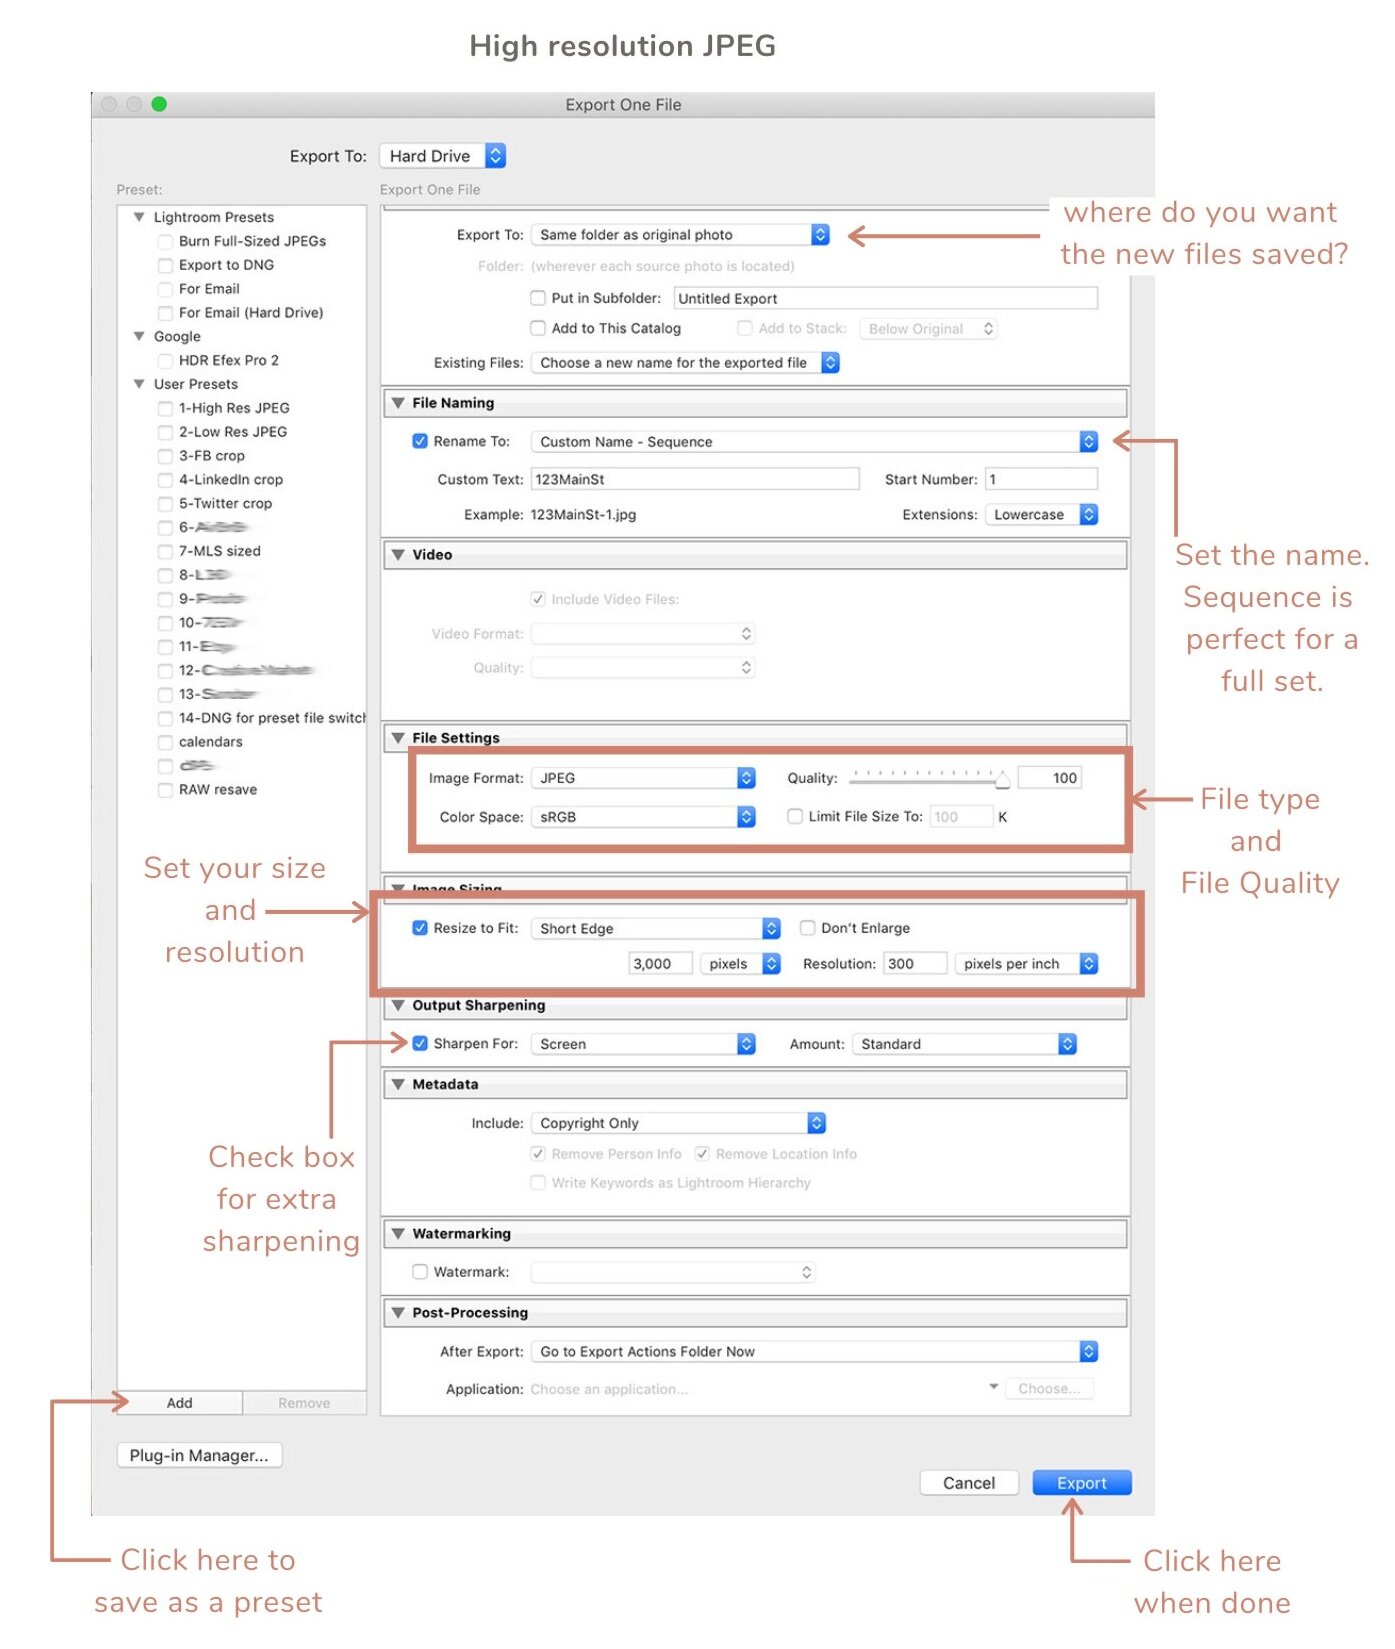
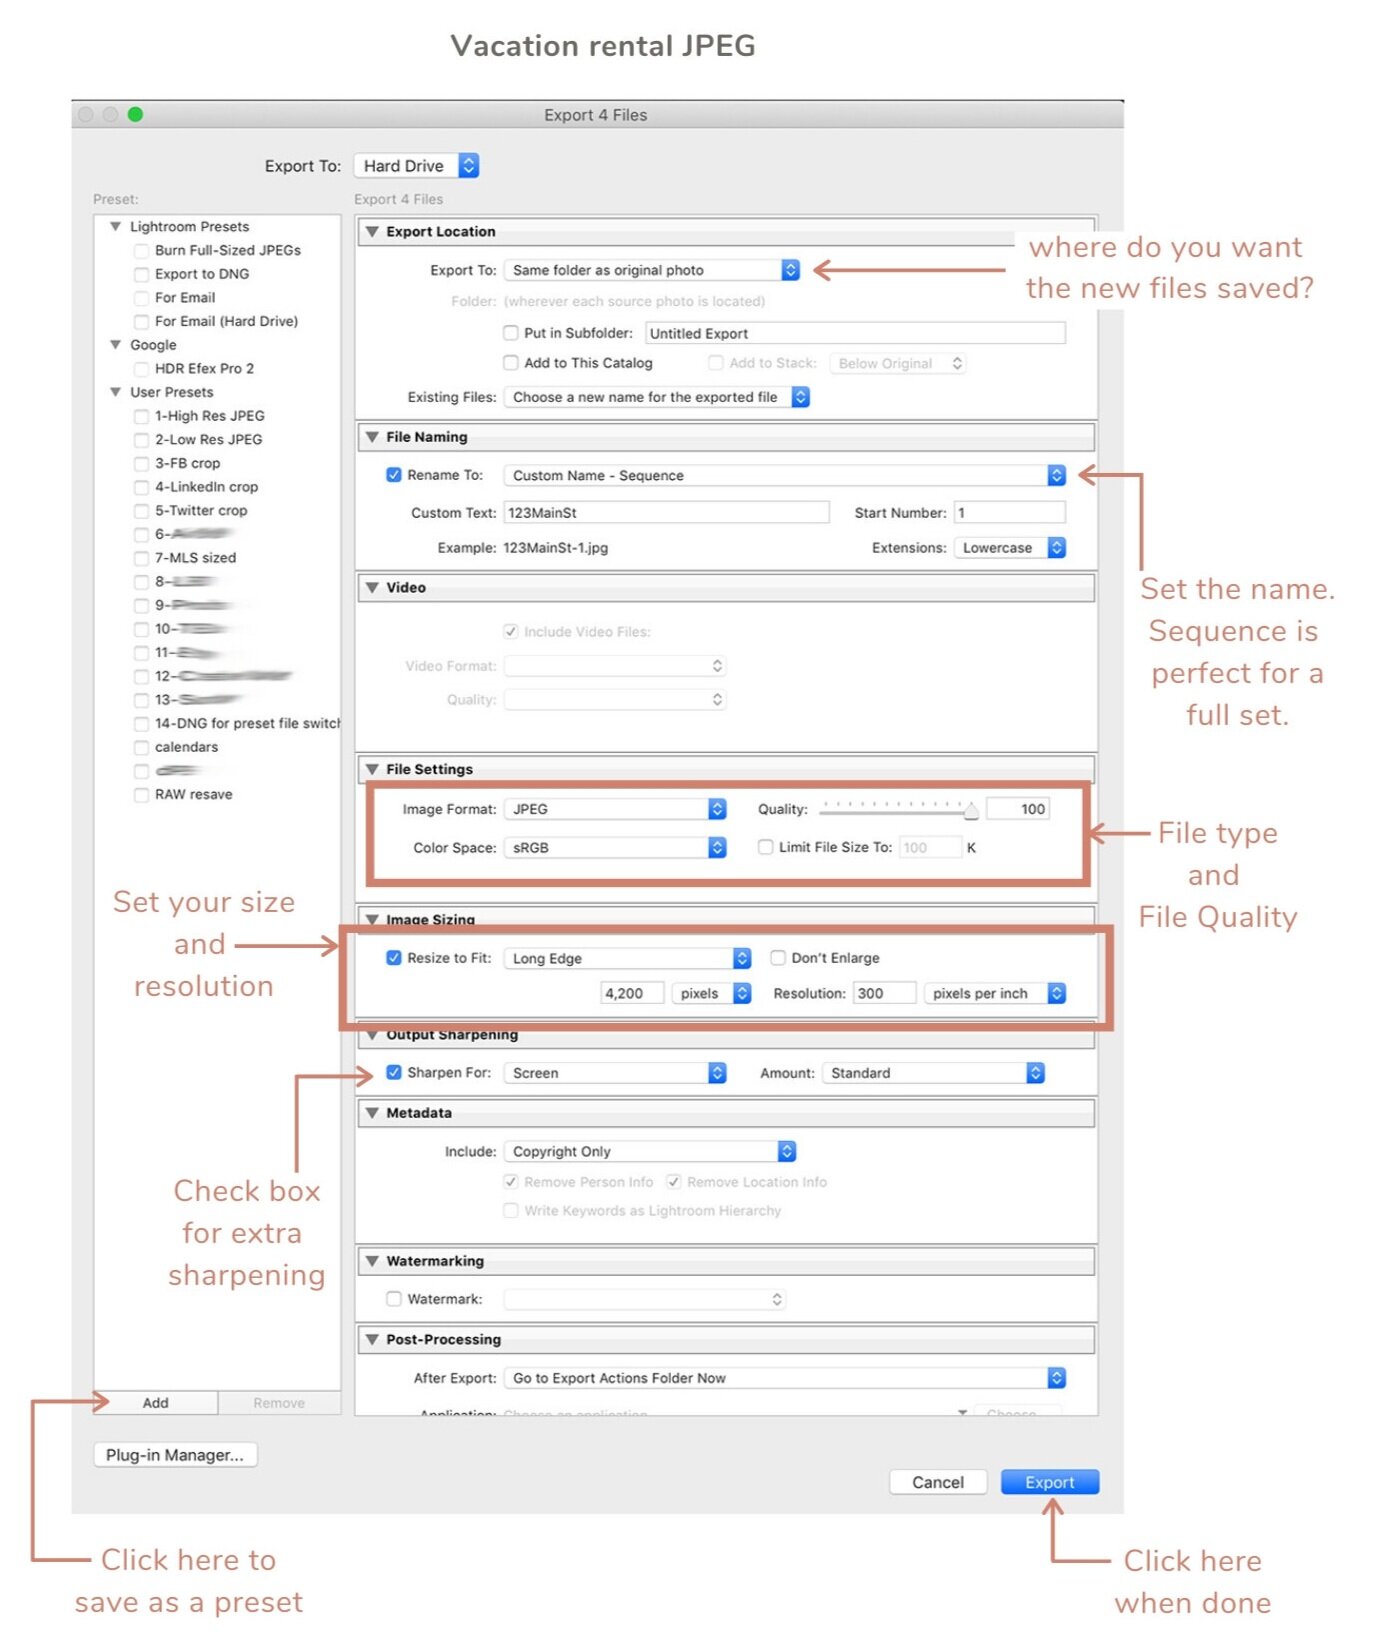
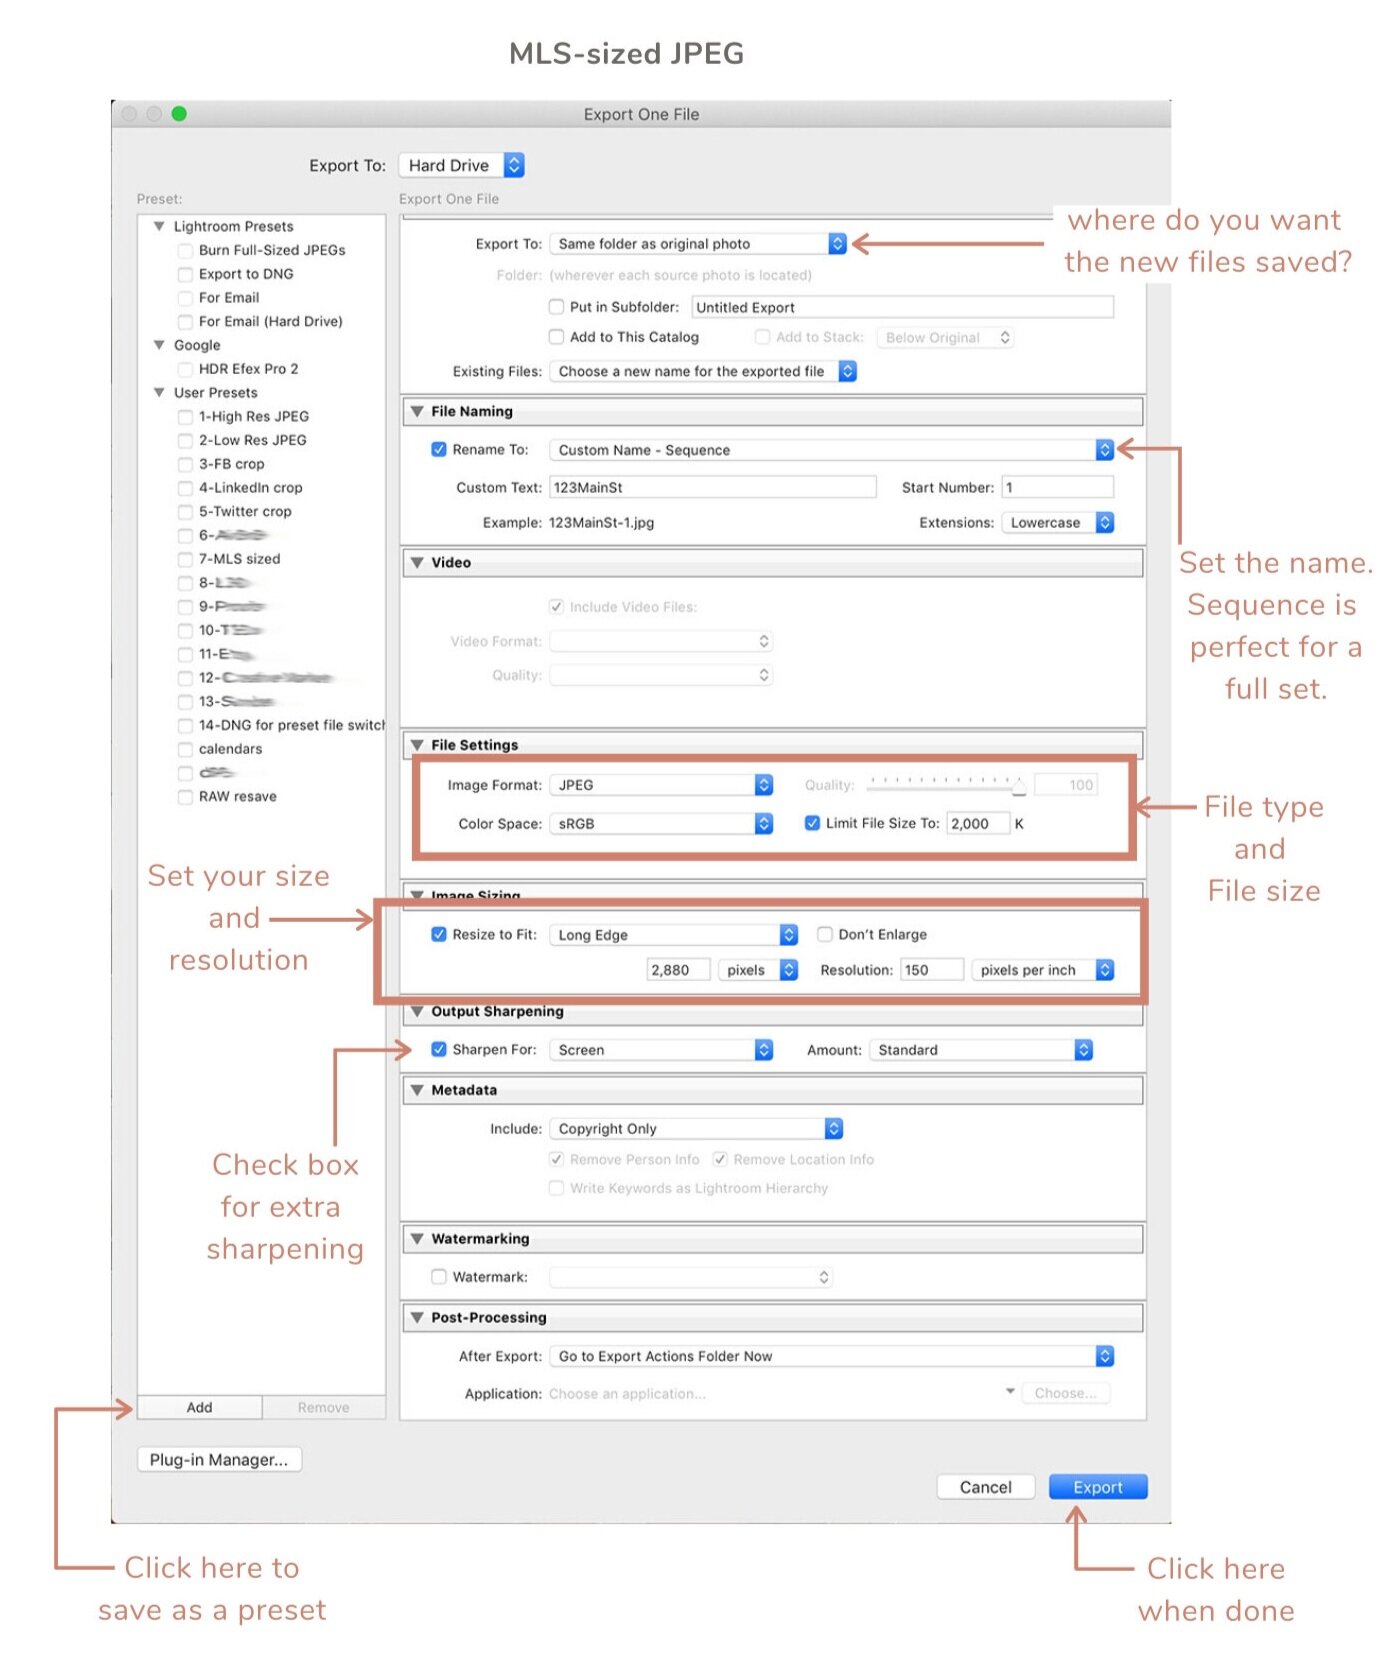
Essentially, there’s no one answer for this. The settings that you use for exporting photos come down to the type of use that the photos will have. Some clients will have a specific requested size or resolution, while other may just need a high-resolution photo that can serve multiple purposes. To help you get started, I’m sharing my export settings for my top three needs - High-resolution JPEG, vacation rental JPEG, and MLS sized JPEG.


Export Presets - what, why, and how?
Lightroom is ALL ABOUT presets. So it makes sense that they would let you save your export settings as presets, too! On each image above, you see a spot in the lower left corner that points to a button with the word “Add”. Once you have your settings set, you click on “Add” and it will take you to a new screen where you name your preset and save it. That’s it! From then on, you’ll have those settings available to you with one click.
Creating your own Lightroom presets is especially handy for commonly used sizes like the ones above, or if you have a client that requests a specific size and resolution for their photos. Often, these are larger companies that have their standards set for their in-house web designers.
xo,
Natalia


